KroyOoz.tv
Summary
KroyOoz.tv is a proof-of-concept project for fans of a fake livestreaming personality called KroyOoz.
Users can sign up and create their accounts using Google or Discord OAuth 2.0 and then choose a username. After choosing a username, users can head to the Stream page to participate in the real-time chat while watching the embedded livestream. The chat includes emotes and options that can be tailored to each user’s preferences. The chat is also role-based, giving privileged users like administrators access to chat moderation commands.
On the home page, past broadcasts and recently published videos can be seen from KroyOoz’s Youtube. You can also view his latest tweets, and hot posts from his subreddit.
The plan
Originally, like some of my most ambitious projects, the planned scope of KroyOoz.tv started much larger than it actually ended up being.
Livestreaming simultaneously on multiple platforms (like Twitch, Youtube, Facebook, etc.) is a great idea for a livestreamer because it increases their discoverability and exposure to new fans. It does come with a downside though, in that each platform has their own separate chatting service. This can create a split in the livestreamer’s community of fans, where half of them are chatting on Youtube, and the other half are chatting on Twitch.
The idea for this site was that it should allow a livestreamer to gather fans onto one semi-independent platform while still reaping the benefits of other large platforms. It should:
- Create a place where fans can easily engage with content surrounding the specific livestreamer.
- Utilize livestream embeds from other platforms to avoid the massive amount of bandwidth it would take to host it independently.
- Give the livestreamer more control over the chat and the ability to create custom experiences that couldn’t happen happen on larger platforms.
Frameworks and Libraries
Typescript
This project was the first time I had used Typescript. Strongly typed languages aren’t totally alien to me, however I found Typescript to be quite a challenge to get comfortable with. Typescript at times felt like more of a burden than a help throughout this project, but sometimes that’s how learning experiences are. Either way, I’m glad I learned it and don’t see any reason to go back to vanilla Javascript.
Next.js
Next.js was also a brand new addition to my toolbelt on this project. Before starting, I knew the project had to be a fullstack one, and I was already familiar with React, so Next.js seemed like the logical choice.
If there’s one thing Next.js makes easy, it’s routing. That alone I think almost makes it worth using over plain React, but Next.js also makes it dead simple to pick between different rendering options like SSG, SSR, or ISG.
NextAuth
NextAuth was a breeze to use and made authentication easy. It perfectly integrated with MongoDB for session based authentication and came with support for several OAuth 2.0 providers out of the box. The server side of the authentication came down to only 66 lines of code, which is really saying something.
Here’s 13 lines of code that will handle Google OAuth with JSON web tokens instantly:
import NextAuth, { NextAuthOptions } from 'next-auth';
import GoogleProvider from 'next-auth/providers/google';

export const authOptions: NextAuthOptions = {
	providers: [
		GoogleProvider({
			clientId: process.env.GOOGLE_ID,
			clientSecret: process.env.GOOGLE_SECRET,
		}),
	],
};

export default NextAuth(authOptions);
Socket.IO
Working with sockets was new to me, but with Socket.IO’s great documentation, learning about websockets became fun.
It was the backbone of the chatting side of the application. With built in reconnection handling, long-polling fallback, packet buffering, and rooms, a lot of the hardest work was already done for me.
The event-based communication between client and server is especially powerful in a framework like Next.js where both client and server exist on the same codebase. Throw in Typescript, and you now have type safety across the board.
enum SocketEvents {
	CLIENT_SEND_MSG,
    ...
}

// server-side
socket.on(SocketEvents.CLIENT_SEND_MSG, () => {
  ...
});

// client-side
socket.on(SocketEvents.CLIENT_SEND_MSG, () => {
  ...
});
Stiches
Before this project, I had always used SCSS/CSS modules for any web app styling. However I occasionally found it frustrating to have to manage the separation of files between my components and their styles. So a CSS-in-JS solution was the next step. Stiches is a CSS-in-JS library that claims a near-zero runtime. I was immediately intrigued.
Uniquely, instead of using tagged template literals, Stiches uses object style syntax to create components like so:
import { styled } from '@stitches/react';

const Button = styled('button', {
	backgroundColor: 'gainsboro',
});
With IDE extensions easily solving the issue of auto-completion inside the template literals of other CSS-in-JS libraries, the advantage of this seems to be type checking for property values and performance.
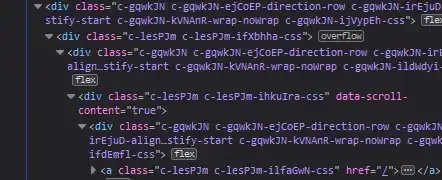
Like most CSS-in-JS libraries, Stiches takes care of the annoying problem of naming CSS classes. However, this comes at the cost where trying to read your browser’s DevTools Inspector becomes a waking nightmare.

Personally, I wouldn’t use Stiches again unless I had to.


